
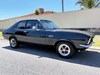
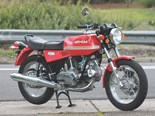
1972 LJ Torana XU-1: Project Purple part 3
 1972 LJ Torana XU-1: Project Purple part 3
 1972 LJ Torana XU-1: Project Purple part 3
 1972 LJ Torana XU-1: Project Purple part 3
 1972 LJ Torana XU-1: Project Purple part 3
 1972 LJ Torana XU-1: Project Purple part 3
 1972 LJ Torana XU-1: Project Purple part 3
|
|
|
1972 LJ Torana XU-1: Project Purple part 3
|
|
|
|
1972 LJ Torana XU-1: Project Purple part 3
|
|
|
|
1972 LJ Torana XU-1: Project Purple part 3
|
|
|
|
1972 LJ Torana XU-1: Project Purple part 3
|
|
|
|
1972 LJ Torana XU-1: Project Purple part 3
|
|
|
|
1972 LJ Torana XU-1: Project Purple part 3
|
This time we get a nasty surprise and then head of to the chromers

|
|
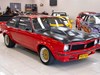
Project Purple - Torana XU-1 part 3
|
1972 LJ Torana XU-1
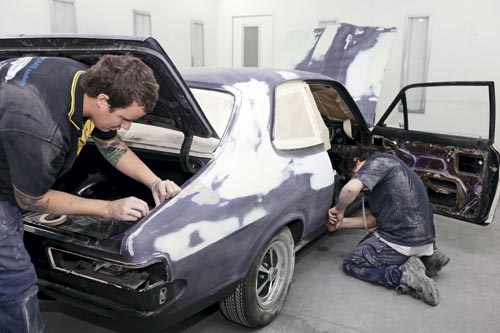
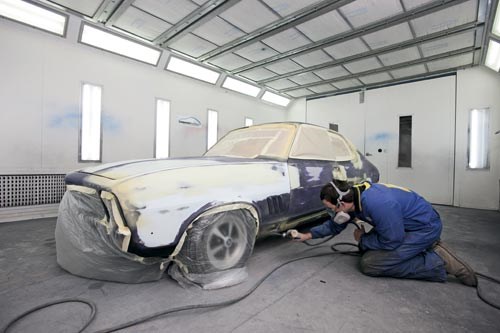
Chris from Corporate Auto Body is looking a little frazzled when we turn up, but is basically happy. The Torana, which had been suspiciously easy to work on up to this stage, has delivered a monster surprise. It had been painted with two different materials: two-pack on some of the top surfaces and acrylic for the rest.
"Once we started blocking with the 80 grit sandpaper, which was our original intention," he explains, "the scratches, being acrylic, have almost swelled, and we’ve sort of gone, ‘oh this is not good’."
"So what we’ve done," he says, "is gone down fine in the paper, still essentially the same process [but] it stretches things out this way." In fact, it’s put the whole project back by a week. "Then we’ve used our tight pulling putty, our two-pack putty, picked up all our ripples and lows, blocked it nice and fine, finished it with a 180 paper and the results are as you can see. The car is nice and straight now – we’re happy with that."
Along the way they’ve fixed a rust spot on the left front guard and had a hell of a time straightening the boot lid and the bonnet, "which looked like someone surfed on it," quips Chris.
The difference is incredible. While the car was a good one to start with, it didn’t stand up so well to really close inspection. There was the odd ripple, and some of the top surfaces needed work. Now you can sight along it and see it’s dead straight.
Baring All
In case you were wondering, we made a conscious decision not to go back to bare metal. Why? Chris summed it up: "There will be a lot of people out there saying, ‘oh it’s an XU-1 Torana, it should have gone back to bare metal, it should have gone on the rotisserie’.
"That’s all well and good if you’ve got $150,000 to spend and you’ve got two years to play with. Now, this vehicle is not a Summernats Grand Champion vehicle. But it will look better than it did when it was brand new. It’ll be absolutely lovely."
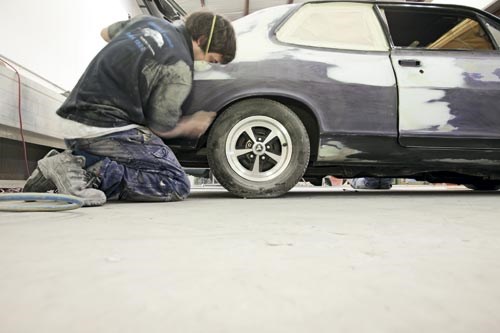
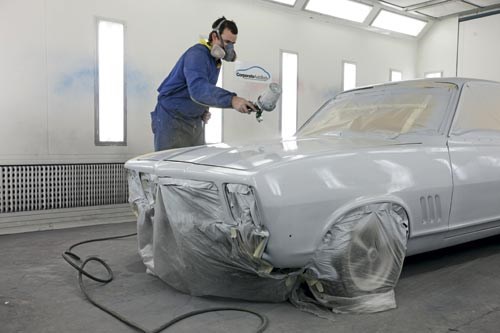
What happens next? Now we’re applying two coats of primer and then baking it at 60 degrees C for an hour or so. This process allows the chemical residue from the old paint to ‘sweat out’.
"We’ll let it sit for about a week, then we’ll block that with 180 first time round to check our lows and our highs," says Chris. "We’ll go 180 and then 240, then two coats of primer and then it’ll be blocked, 240, 500 and then wet-rubbed and it’ll be ready for paint."
So, if ever you get a fright from a paint quote on an old vehicle, you’ll now understand why the bills can add up!
Shiny Stuff
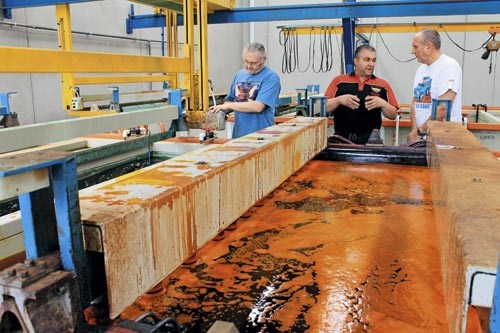
Surprisingly, one of the tougher things to source on our ever-increasing list of needs was decent chrome for the bumpers. Like the rest of the car, they looked pretty good, but we know from past experience that they’ll end up looking just a little shabby compared to the body once the new suit of purple has been applied.
Okay, so get on the web and find a chrome shop, right? The trouble is, finding a really good one can be a pain. Fortunately for us, Joe Xuereb from Rare Spares had been through exactly the same process just before we bought Project Purple and offered a tip. Try AA Vinneys down in beautiful downtown Dandenong (Victoria).
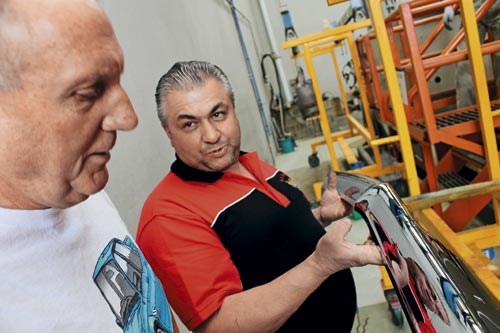
What makes a good chrome-plater? "You’ve got to have a love and passion for your work," Vince from AA Vineys explains. "That really shows up in the end result. That’s the problem with a lot of people in many industries, they only worry about how much money they make. You’ve got to put the effort into it. It’s like building a good car. I reckon we put about six to 10 hours of labour and effort into every bumper bar."
The process is longer than you might first expect, and here’s how it goes: repair, strip to bare metal, polish, copper plate (three coats), re-polish (copper is effectively used as a primer, looking for imperfections), bright nickel (which has a yellow hue), rinsing, activation, chrome flash.
At around $400 (sometimes more) per bumper, it’s not a cheap exercise, but when you see what it entails, you start to understand why. Each stage has its own little technique, according to Vince. Pointing to the bloke dipping a bumper through the final stage, he says that person needs to know exactly what he’s doing as two different people can end up producing very different results.
So we’ve got the Torrie’s bumpers sorted and the body preparation is just about finished. Next issue we’ll cover applying colour and we’ll be looking into the depths of the engine bay for a clean-up. Wish us luck…
ABOUT VINNEYS
It all started about a quarter of a century ago when Vince, fresh out of school, decided he wasn’t going to stay in the family grocery and deli game.
He got word of a metal polishing business for sale and decided to give it a go. The inspiration for getting into chrome came from his own shed. There stood his first car, the EH Holden he bought as a kid, and it wanted a little work. "That’s the car on my business card today," Vince says proudly.
The workshop started off pretty small, in the back blocks of Gasolene Alley, whereas the current shop is state-of-the-art and just 18 months old. He and partner Anna say it represents a long-held dream.
RARE SPARES 5 CLASSIC REVIVAL TIPS
01 Just about every project takes longer than expected and throws up at least a few surprises. If you know this going in, you won’t be disappointed.
02 Body preparation is everything when it comes to resprays. A good 80 percent of the work is in getting the surface right, otherwise you can end up wasting perfectly good paint.
03 Whether you go for acrylic or two-pack, stick to one choice and one painter.
04 Be prepared for a shock once the paint is right – almost everything else will look shabby. So count on replacing or refurbishing the trim.
05 Any chrome looks good until you put it beside a job that’s been done really well. Spend the extra now and get it done by a reputable expert who understands restorations.
Unique Cars magazine Value Guides
Sell your car for free right here
.jpg)
Get your monthly fix of news, reviews and stories on the greatest cars and minds in the automotive world.
Subscribe


.png)

